Drawing with ms. Rossi
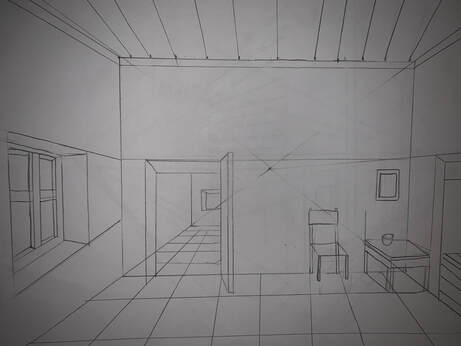
Drawing a room from one point perspective: we were assigned to watch the tutorial on drawing a room in one point perspective, and copying it.
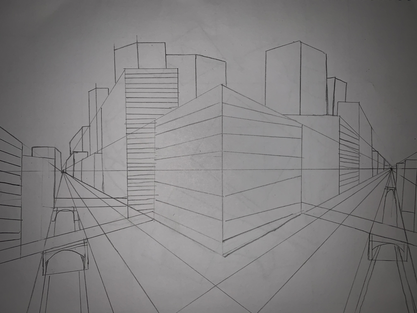
Drawing a city from two point perspective: we were assigned to watch the tutorial on drawing a city in two point perspective, and copying it.
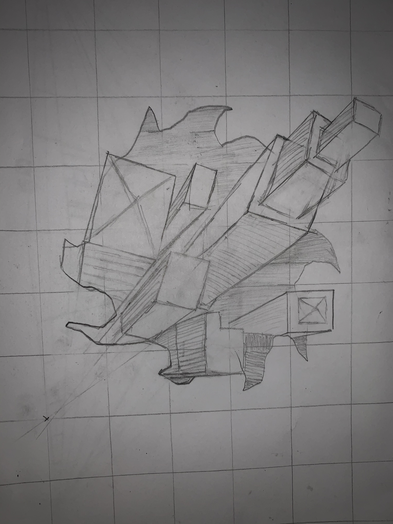
Drawing a 3D city: we were assigned to watch a tutorial on drawing a 3D city, and to copy it.
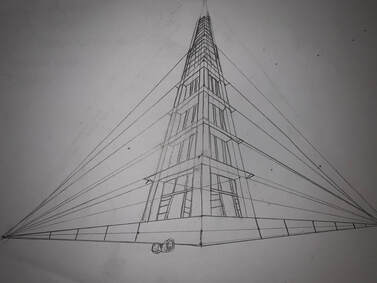
Drawing a building from three point perspective: we were assigned to watch the tutorial on drawing a building in three point perspective, and copying it.
Look at that view assignment
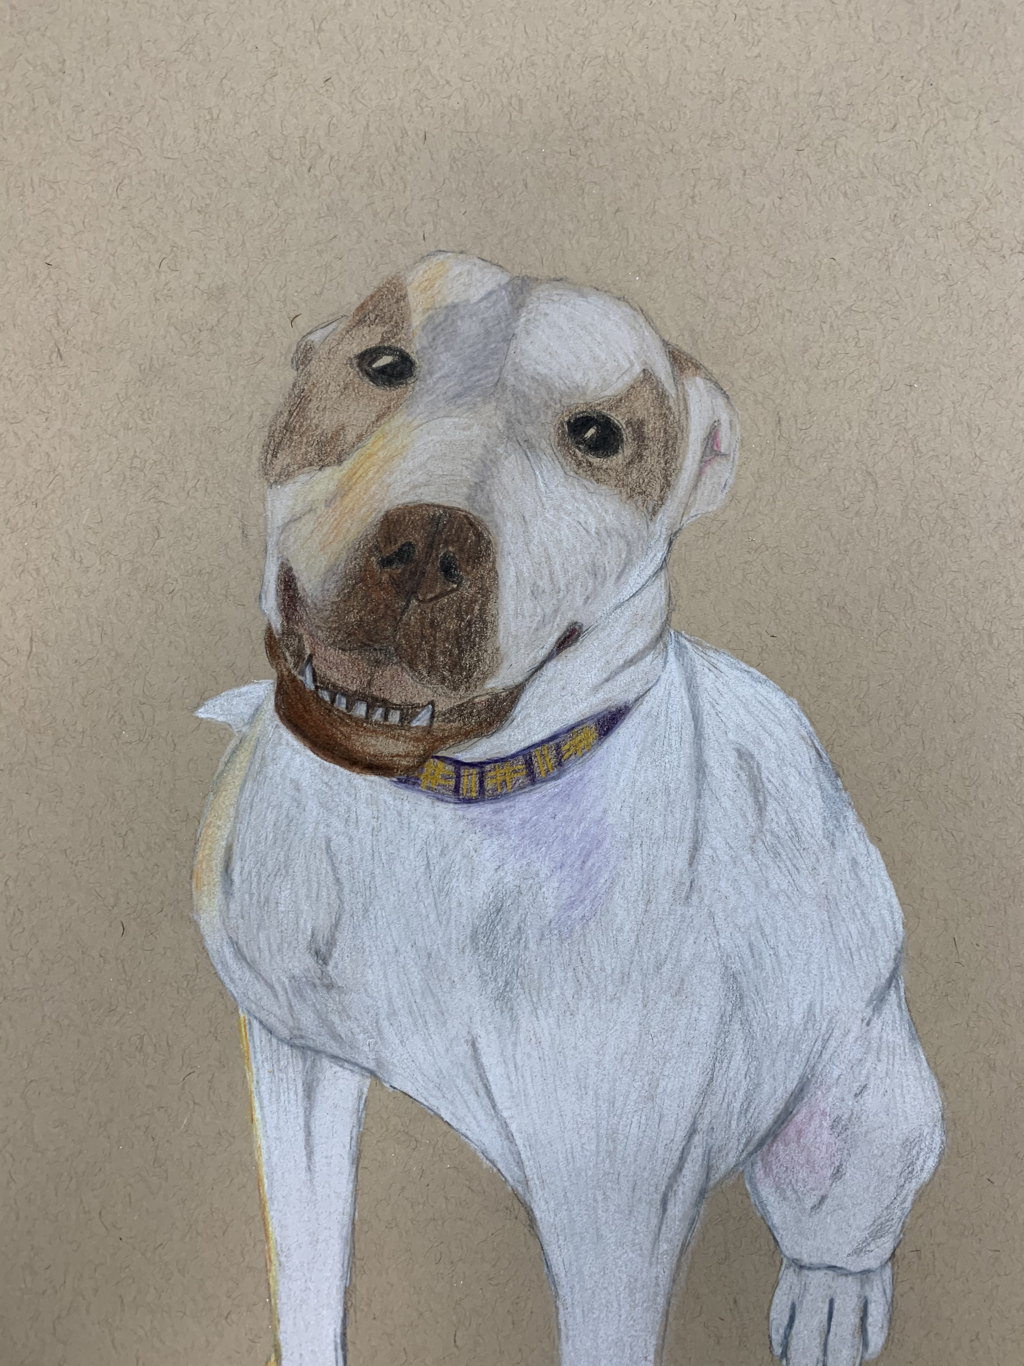
For this assignment, we were assigned to find or make a picture taken from a perspective, and draw it in pencil or prismacolors.

I used layers of certain colors to exaggerate different colored spOts

I chose a picture I took of my dog for this assignment. It was a lot of fun to do and had a good time discovering how you can define colors you don’t usually see with prismacolors.

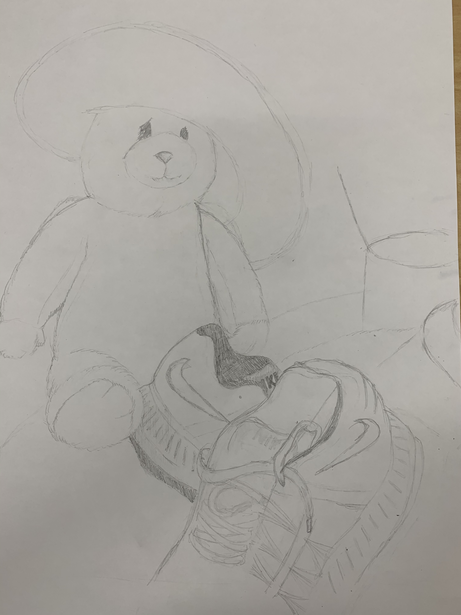
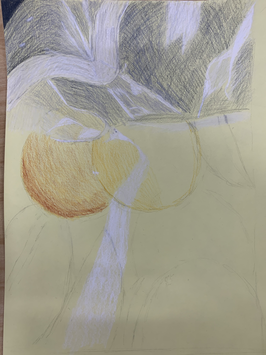
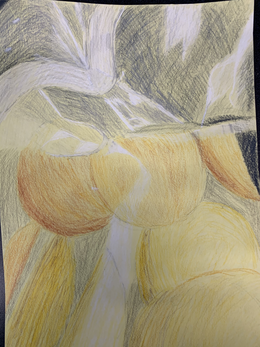
Form still liFe drawing
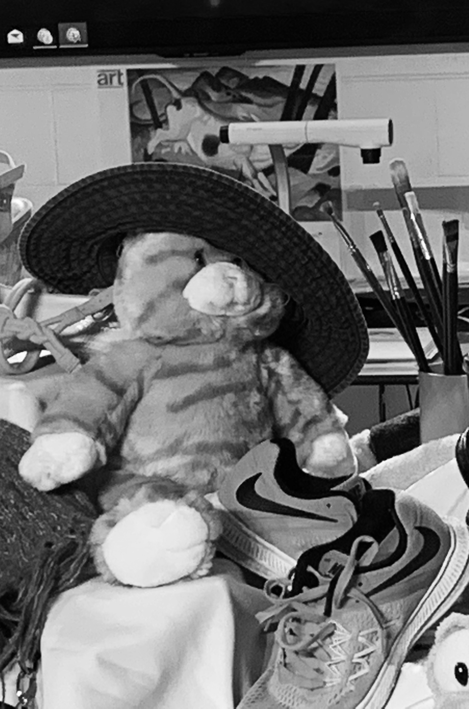
For this assignment, we were to take a photo of a certain section of items, and were assigned to draw it as according to your picture.

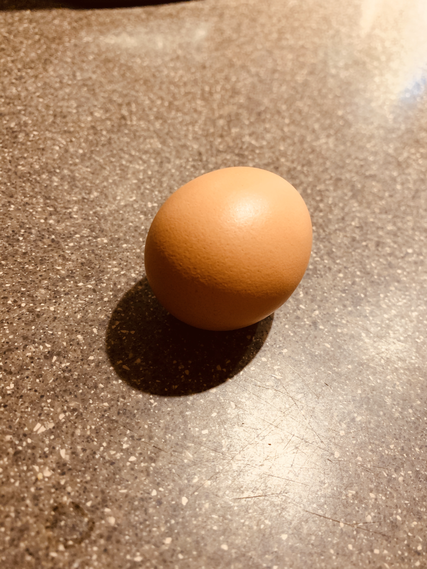
Egg Study
For this assignment we were to take a picture of an egg and draw it. We had to do this drawing with pastels. This practiced our shading and usage of pastels.
Life Saver drawing
For this assignment, we were given a lifesaver candy to draw. We drew it in white colored pencils to stress the lighting of the folds in the plastic. This practiced our shading angles.
Candy drawiNg
For this assignment we took a picture of a portion of candy and drew it. We used whatever colored pencils we needed. This drawing helped improve lighting and shading skills.
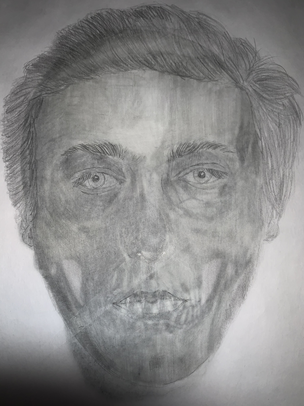
Skull/face drawing
For this assignment, we had a picture of a skull, in which we traced our faces over. This was done with pencil on tracing paper. This practiced our ability in facial features and putting them in the right place.
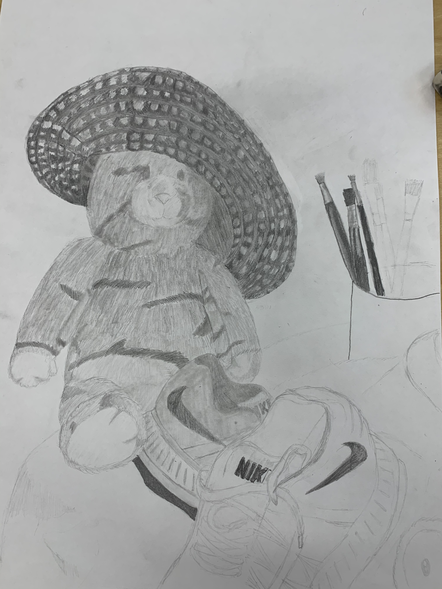
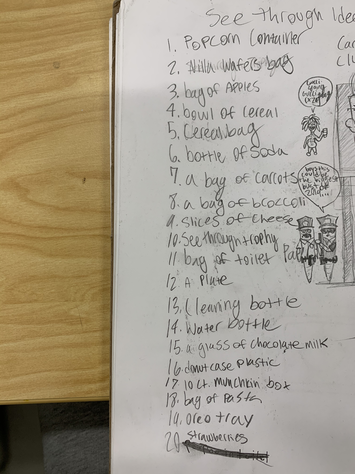
Look what you can see through drawing
Brainstorming
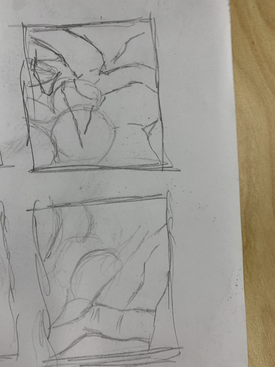
Compositional Sketches
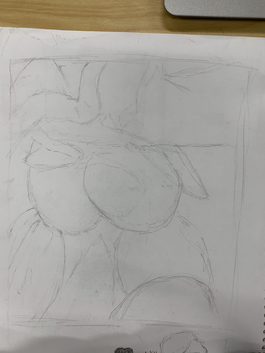
Final Sketch
In Progress
1.Describe the craftsmanship of your drawing. (Is it neat and well executed?)
This drawing was messy, sort of all over the place.
2.Describe how your background choices help unify the three artworks and tie them together as one piece of art.
My background choices helped me understand the shading and the lighting of the drawing and where dark and light areas would be.
3.Describe your choice of colors/color harmonies and how you used them throughout the artwork.
This drawings colors were mainly light. the picture is a bag of vanilla wafers, that was taken under a light, so that shows the lighter spectrum of color in the drawing.
4.How did you create contrast in your drawing?
i contrasted by taking the empty room at the top of the bag to represent the darker part in color, and the opacity all the way through.
5.How did you use textures, highlights and shadows to enhance your artwork?
I used textures to represent the insides of the bag and the emptiness of the bag, i used highlights to represent the highest points of the creases in the bag where the light shines, and shadows to represent the deeper parts of the folds in the bag.
6.Why did you choose a particular background color to mount your artwork?
The dark grey provides a basis of a lighting scale, given that the dark grey background is the darkest, it provides foundation for lighting.
7.Discuss the importance of understanding the media (prisma or pastels) and acquiring the skills necessary to create a successful project.
You need to understand this to be able to work with the coloring and shading so it does not get messy.
8.Describe any difficulties you had creating your drawing and what you could do to improve your drawing?
I had difficulty finding a good color to represent the color of the wafers, and I got impatient with the shading, and rushed it. I could have improved on these by spending more time finding the right color, and not rushing the shading.
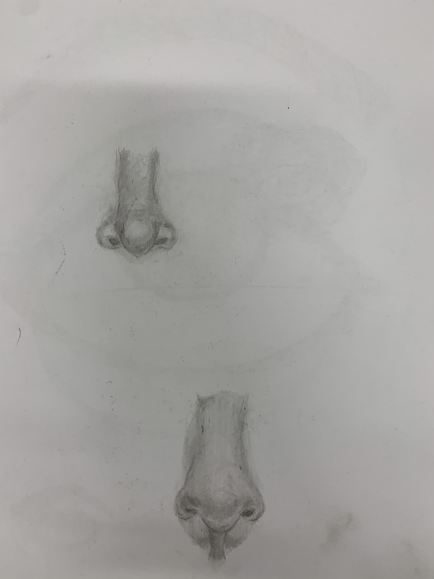
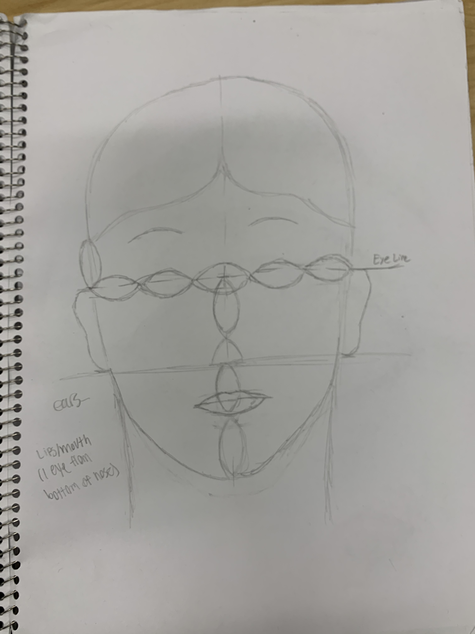
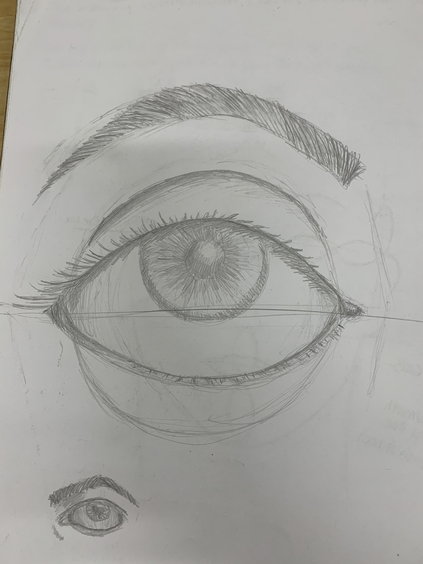
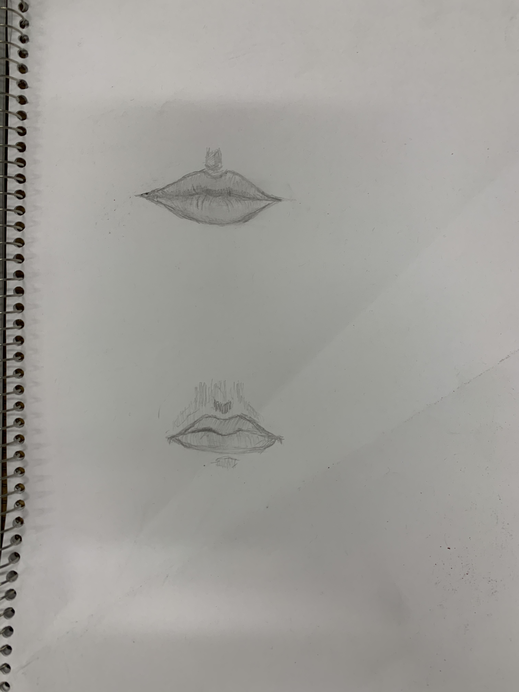
facial feature/structure drawings

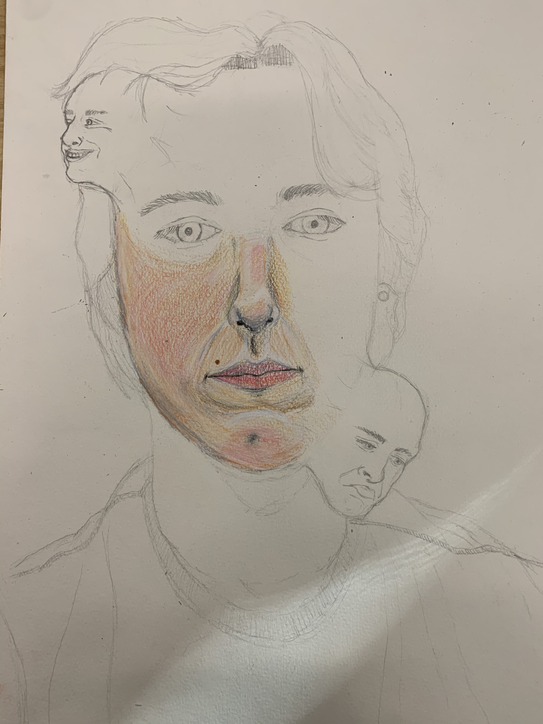
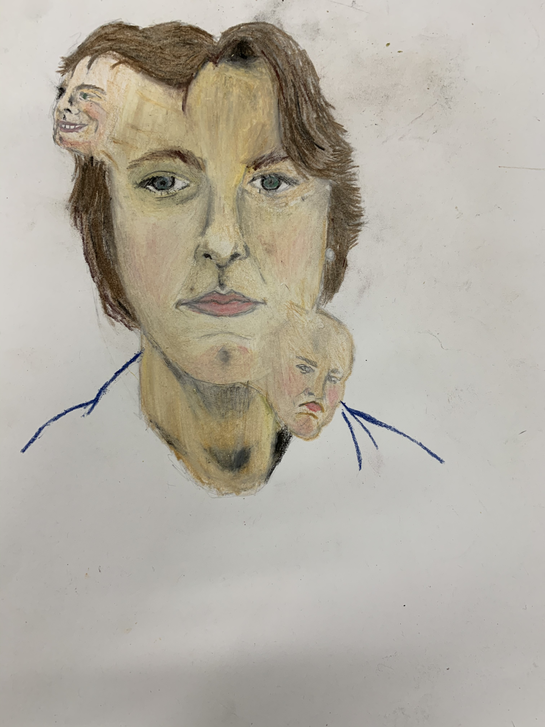
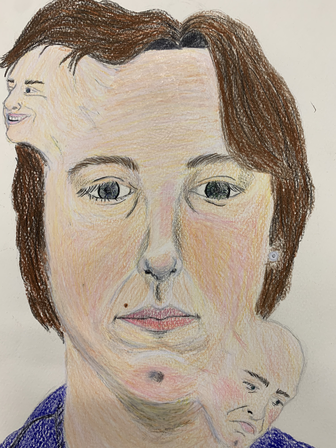
Expressional portrait project


Self evaluation
1. Explain the process you went through to develop your drawing.
I was running through ideas, mainly generic until I though of conveying inner emotions as separate faces coming out of my straight face.
2. Explain how you found the different values in the portrait?
I looked for the deeper parts of my faces and the parts of different color so I would know where to shade and add color.
3. Did you achieve a full range of the different values within your portrait? How? yes, I included my shirt, skin, and hair.
4. Describe your craftsmanship. Is the artwork executed and crafted neatly?
the coloring is rough, I could have spent more time smoothing it out.
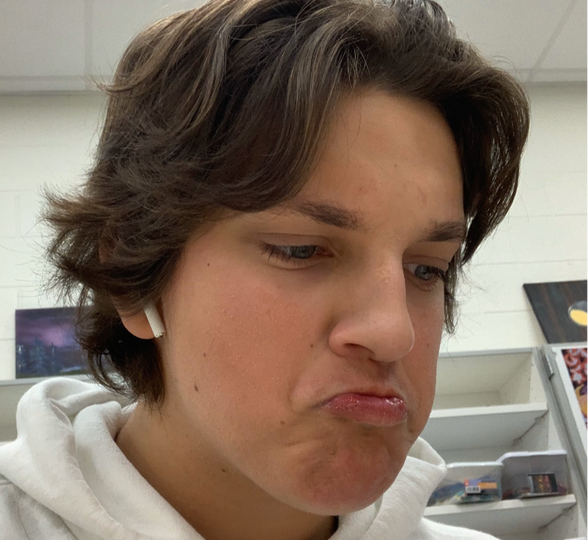
5. How were you able to capture your look?
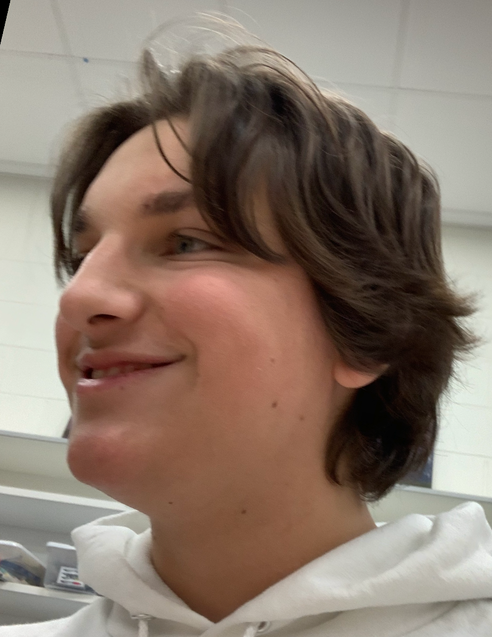
taking 3 photos of myself, one with a straight face, one with a sad face, and one with a happy face.
6. Explain how you made sure you had correct facial feature placement.
I used the facial structure drawing rules we found in class, with measurements using eyes.
7. Explain the importance of learning how to draw all the features individually.
It is important you learn these features individually, so you can go into deeper detail, and recognize features of them when you draw them all together.
8. What part of this unit was the most beneficial and why?
Learning the measurements, where everything goes on the face, and how to size it, is definitely the most important, because, for it to look real in the first place the placement has to look real.
9. List any obstacles you had to overcome and how you dealt with them.
My worst obstacle was that i had accidentally colored my face orange, and reverting it back to skin color was very difficult, but i managed to pull it off. Shading very slight changes in skin tone was also very difficult.
1. Explain the process you went through to develop your drawing.
I was running through ideas, mainly generic until I though of conveying inner emotions as separate faces coming out of my straight face.
2. Explain how you found the different values in the portrait?
I looked for the deeper parts of my faces and the parts of different color so I would know where to shade and add color.
3. Did you achieve a full range of the different values within your portrait? How? yes, I included my shirt, skin, and hair.
4. Describe your craftsmanship. Is the artwork executed and crafted neatly?
the coloring is rough, I could have spent more time smoothing it out.
5. How were you able to capture your look?
taking 3 photos of myself, one with a straight face, one with a sad face, and one with a happy face.
6. Explain how you made sure you had correct facial feature placement.
I used the facial structure drawing rules we found in class, with measurements using eyes.
7. Explain the importance of learning how to draw all the features individually.
It is important you learn these features individually, so you can go into deeper detail, and recognize features of them when you draw them all together.
8. What part of this unit was the most beneficial and why?
Learning the measurements, where everything goes on the face, and how to size it, is definitely the most important, because, for it to look real in the first place the placement has to look real.
9. List any obstacles you had to overcome and how you dealt with them.
My worst obstacle was that i had accidentally colored my face orange, and reverting it back to skin color was very difficult, but i managed to pull it off. Shading very slight changes in skin tone was also very difficult.
SELF EVALUATION
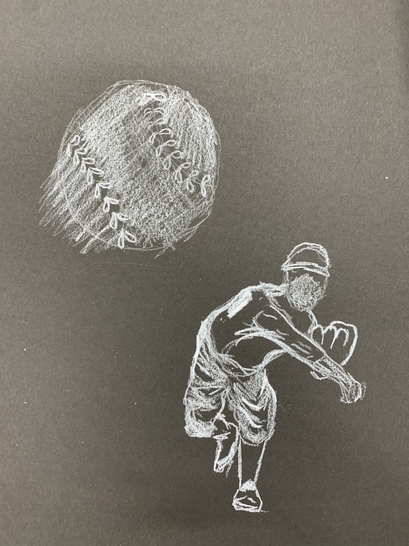
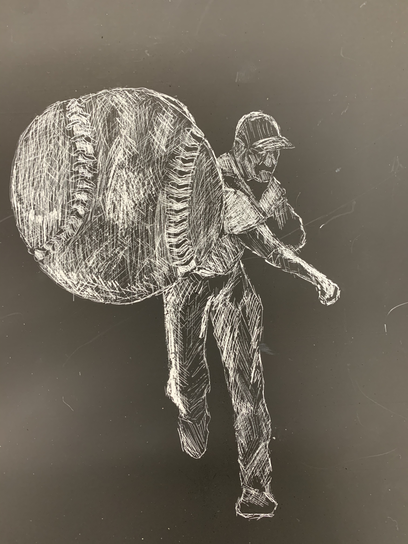
2. How did you use textures to enhance your picture?
I used textures to demonstrate the close baseball and the man far in the distance.
3. How did you balance your artwork and create a well-organized composition?
I focused on making the baseball player stand out from the background and show the ball getting closer.
4. How did you imply movement in your drawing?
The movement was expressed by showing the ball in larger size in comparison to everything else.
5. How could you improve your artwork?
I could have worked more on the background and made it less messy.
6. How did you demonstrate a wide range of shading values?
I demonstrated different shading values by cross hatching lighter and darker areas so it was easy to differentiate from other surfaces/objects.
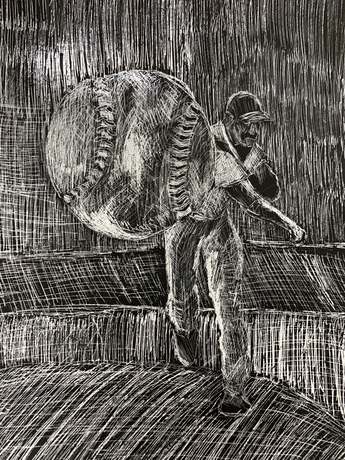
- Describe the subject matter and meaning of your artwork.
2. How did you use textures to enhance your picture?
I used textures to demonstrate the close baseball and the man far in the distance.
3. How did you balance your artwork and create a well-organized composition?
I focused on making the baseball player stand out from the background and show the ball getting closer.
4. How did you imply movement in your drawing?
The movement was expressed by showing the ball in larger size in comparison to everything else.
5. How could you improve your artwork?
I could have worked more on the background and made it less messy.
6. How did you demonstrate a wide range of shading values?
I demonstrated different shading values by cross hatching lighter and darker areas so it was easy to differentiate from other surfaces/objects.
Final exam
|
|
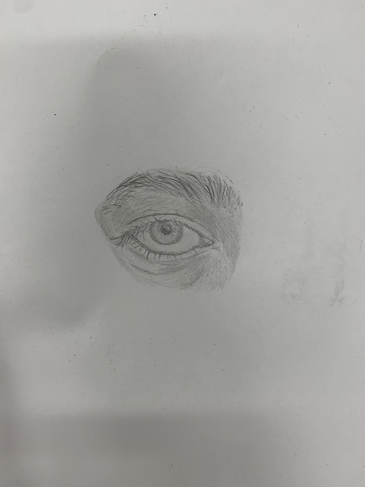
1.How do you describe your artistic style/perspective? How do you define success as an artist? What do you find most rewarding about being an artist? What are some of the most important skills you draw upon to create your work? What are some of the most significant things you've learned through art-making?
I see my style as expressive and it expresses how I want my art to look, which can be expressed through different styles of shading or coloring. I define success as when you come to peace with your own work and enjoy it rather than hate it. The most rewarding thing about being an artist is that you can do anything you would like. There are no limits to what you can draw, it really exercises your imagination. The most important skills to practice are definitely value and shading. its important to know the deepness of certain areas of what you are creating in order to keep it realistic. The most significant thing I learned is that it wont always be perfect and you can always start over and try harder, I also learned patience, and dedication. 2.Look at your body of work over the semester and choose 2 pieces that show your growth as an artist. Discuss each piece and how you grew in the following areas: application of materials, techniques and skills, artistic vision, use of the principles and elements, creativity, intuition and subject matter. This was my first assignment in the class. I was assigned to study a draped sheet, practicing depth and shading, in charcoal. I rushed it way too much and did not focus on blending the shading, which only made it worse This is my eye I drew from the facial structure unit. I picked this drawing to compare because It shows how I improved in my shading and patience. In this drawing you can actually tell what it is, which shows how I improved on my art. 3.What medium was your favorite to work with? Explain why and how you were able to master the techniques associated with this medium. My favorite medium is pencil. There are so many different ways to shade with pencil, and for me, it makes my art more presentable, and enjoyable to me. I mastered techniques by practicing on sketches I did not really care about, and applying these new techniques to class assignments. 4.Discuss one project where you felt you were the least successful. Explain why you felt this way. What would you do differently to change this piece? Explain. I felt this was least successful because during the time I created it, I was very stressed with school, and felt like I did not have time for it, so I slacked off. I rushed the coloring in attempt to have it over with, and the shading was also very rushed. I would have picked something else to draw, something i had found more enjoyable, so I would have taken my time to make it look as best as possible. |
